Has your attic been feeling a little drafty lately? Those heating and cooling bills looking bigger than you’d like? Well it might be time to insulate that attic with some spray foam!
Spray foam insulation creates a protective barrier that seals out heat in the summer and cold in the winter. Unlike old fashioned fiberglass batts that can sag and leave gaps over time, spray foam expands to fill every nook and cranny for complete coverage. The result is a more comfortable, energy efficient home.
Installing spray foam in your attic is a project you can totally DIY in a weekend. Here’s a step-by-step guide on how to get the job done right:
What You’ll Need
- Safety gear – goggles, mask, gloves, coveralls
- Polyurethane spray foam kit
- Plastic sheeting to cover floor
- Drywall knives/scrapers
- Respirators if spraying closed-cell foam
Prep Work
First up, clean out the attic space and remove any insulation or debris in the way. Cover the attic floor thoroughly with plastic sheeting to protect from overspray.
Next, seal up any vents, gaps, or wires between the attic and main home using caulk or spray foam. This prevents foam from seeping where it shouldn’t.
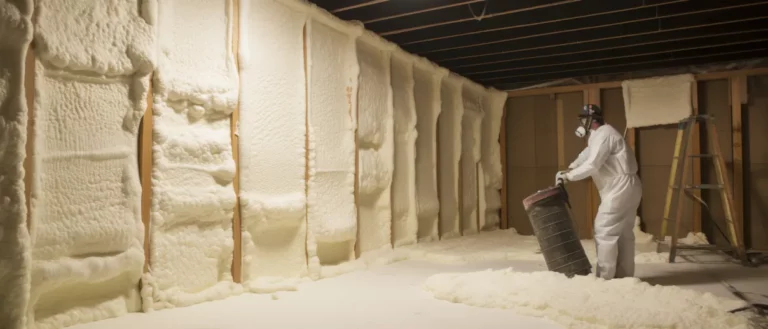
Finally, don heavy duty gloves, goggles, and a mask or respirator. Also wear clothes you don’t mind getting foamy.
Time to Spray!
Follow the kit instructions to hook up and prime the spray foam machine. Adjust the settings to get the right spray pattern and consistency.
Working in sections, apply 1-2″ of foam to the underside of the roof, angled joists, and any other crevices. The foam expands so avoid overdoing the first coat.
Let the foam fully cure for a few hours before adding a second layer to hit the recommended depth of 3-5″. Smooth and trim off any excess foam.
Once fully cured, the foam can be left exposed or covered with drywall for a finished look.
Bask in the Cozy
And that’s it – you just transformed your attic into a well-insulated oasis! Get ready for lower energy bills, consistent indoor temps, and greater home comfort all year round.
Spray foaming the attic yourself saves on labor costs. Just work carefully and follow all product guidelines. With the right prep and protection, you can handle this insulating upgrade in a weekend.