Get ready for a successful spray foam application! Our guide to mixing spray foam covers crucial steps for a perfect blend. Safely prepare components, choose proper equipment, calculate ratios accurately, use efficient mixing techniques, and monitor consistency. Follow manufacturer instructions to ensure optimal results.
Table of Contents
Understanding Spray Foam Components
Understanding the ins and outs of spray foam mixing is key to achieving outstanding results. You see, the two main components, A and B, play a crucial role in the chemical reaction. It’s like a delicate dance where getting the perfect balance is essential. If you add too much or too little of either component, it can throw things off track and affect the quality of your work. So, it’s super important to nail that mixing process and follow the recommended ratios for that top-notch spray foam insulation application.
Importance of Mixing Ratio
Getting the ratio of A and B components right is essential for your spray foam project to be successful, so you need to measure carefully! Mixing accuracy is key for achieving optimal results, as an incorrect ratio can lead to ineffective insulation.
Spraying with improper chemical ratios creates funky foam. A-rich foam comes out thick and viscous, slowly expanding into a dark brown, crunchy, brittle texture full of air pockets and ridges. It looks like a puffed up sponge with a weird webbed structure. B-rich foam first oozes out the gun runny and liquid like raw egg. It expands into a pale yellow, irregular foam with a spongy weak gel texture that shrinks away from surfaces as it cures. B-rich foam can also stink, with a fishy chemical odor as excess resin outgasses. For quality foam insulation with a proper solid seal and smooth, uniform cell structure, stick to the recommended 1:1 mix ratio. This well-balanced formula ensures the foam retains its engineered properties as it cures.
To ensure containment safety, it’s important to follow the manufacturer’s instructions closely and use appropriate protective gear when mixing the components. Additionally, chemical safety must not be overlooked; always wear gloves and a face mask when handling polyurethane foam ingredients.
In summary, there are three main considerations when mixing A and B components: 1) Ensure accuracy in ratios; 2) Follow manufacturer’s instructions for containment safety; 3) Take all necessary precautions for chemical safety.
By taking these steps seriously, you can achieve success with your spray foam project!
PPE, Tools & Workspace
You’ll need the right protective equipment, tools, and workspace before starting to mix spray foam. For safety reasons, it’s important that you have a well-ventilated area with adequate air flow.
You should be aware of any ventilation requirements for your specific product and use the appropriate containment methods to help reduce exposure to potentially hazardous fumes. Temperature control in the work area is also essential, as many spray foam products require temperatures between 75°F and 85°F for optimal performance.
It’s also important to have the right tools on hand when mixing spray foam. A good pair of gloves can protect your hands from direct contact with chemicals, while goggles or face masks can provide eye protection from chemical splashes or dust particles that might be kicked up during the spraying process.
Additionally, having a respirator available will help protect your lungs from inhaling any unwanted fumes or vapors created during mixing. Finally, make sure you’ve got enough workspace in order to properly mix your product according to manufacturer guidelines before getting started with this project.
The Technology behind spray foam mixing
Spray Foam Mixing Chamber
A spray foam mixing chamber plays a vital role in the mixing process of spray foam. It is a component of spray foam equipment used to combine the two main components, typically referred to as A-side and B-side, of the foam. The A-side contains the isocyanate component, while the B-side consists of the polyol component.
The mixing chamber is designed to ensure thorough mixing of the A-side and B-side, creating a homogenous mixture before it is sprayed onto the desired surface. Inside the mixing chamber, the two components are brought together and mixed under controlled conditions, such as pressure and temperature, to initiate the chemical reaction that forms the foam.
Proportioning System
The proportioning system consists of pumps and valves that control the flow rates of the A-side and B-side components. It ensures accurate mixing ratios by delivering the correct amounts of each component to the mixing chamber.
Mixing Nozzle
The mixing nozzle is attached to the end of the spray foam gun. It serves as the final mixing point where the A-side and B-side components are thoroughly mixed just before they are sprayed onto the surface. The nozzle design promotes proper blending and atomization of the foam mixture.
Spray Foam Gun
The spray foam gun is used to apply the mixed foam onto the desired surface. It controls the flow and direction of the foam, allowing for precise application. The gun is typically connected to the proportioning system and equipped with a mixing nozzle.
Temperature and Pressure Controls
Temperature and pressure control systems ensure optimal conditions for the mixing process. Temperature control mechanisms regulate the temperature of the A-side and B-side components, preventing overheating or cooling. Pressure control systems maintain consistent pressure levels during the mixing and application, contributing to the quality and consistency of the foam.
These components work together to facilitate accurate mixing, proper blending, and controlled application of the spray foam. Understanding their functions and ensuring their proper operation is essential for achieving desired foam performance and application results.
Mixing Process
Mixing spray foam correctly is essential for a successful application. To ensure an even and efficient mix, you should prepare the A and B components first. Set up the equipment correctly and calculate the mixing ratio accurately. Also, have a few different techniques to choose from when mixing. Monitor the entire process to produce a quality product every time.
Following these steps will help you produce a quality product every time.
Step 1: Equipment Setup
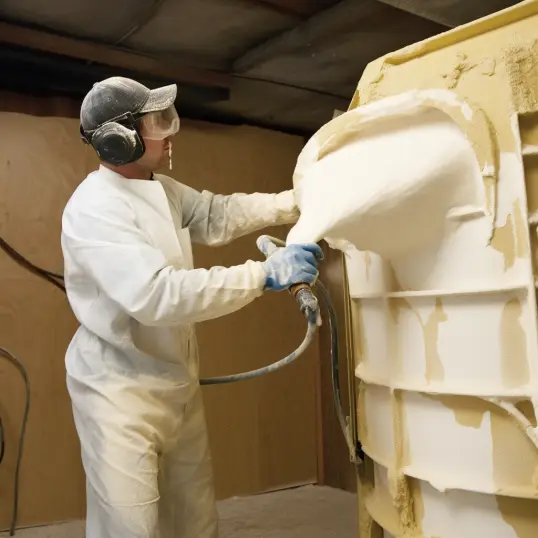
To ensure a successful application of the foam mixture, it’s essential to correctly set up your equipment. When mixing spray foam, safety should always be your priority and you should make sure you have the right protective gear before starting. This includes wearing glasses, a respirator mask, and long sleeves and pants.
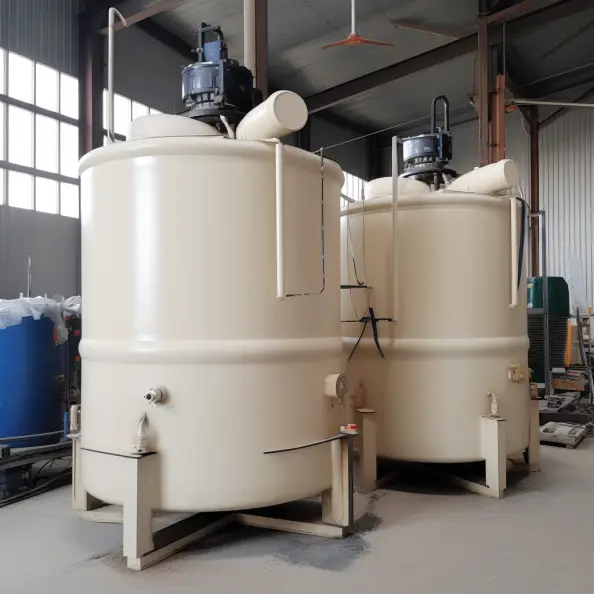
It’s also important to make sure your working area is clean and free of debris that could disrupt the mix process or jumpstart a reaction in the chemicals. Cleaning out mixing tanks from previous batches is one way to ensure accuracy when using new components for each project.
Additionally, having all necessary equipment such as hoses, nozzles, guns, and mixers ready beforehand helps provide an efficient workflow when applying the foam mixture. All components must be securely attached to avoid any potential hazards during use and keep your projects running smoothly.
Taking these precautions will help ensure a safe experience when mixing spray foam with maximum accuracy for optimal results.
Step 2: Prepare the Foam Components
Make sure the A-side and B-side containers are properly sealed and in good condition. Check the temperature requirements for each component and adjust if necessary using temperature control systems.
Step 3: Set Mixing Ratio
Set the desired mixing ratio on the proportioning system according to the manufacturer’s guidelines. This ensures accurate delivery of the A-side and B-side components to the mixing chamber.
Step 4: Pre-Flush the System
Flush the hoses and mixing chamber with a designated flushing agent to remove any residual material from previous use. This helps maintain proper mixing and prevents cross-contamination.
Step 5: Start Mixing Process
Activate the proportioning system to begin pumping the A-side and B-side components into the mixing chamber. Monitor the pressure and ensure the components are being delivered in the correct ratio.
Ultra Precise Mixing for Commercial Jobs
When it comes to commercial spray foam projects, achieving ultra-precise mixing is a critical factor for success. To ensure accurate and consistent results, it’s imperative to invest in top-notch mechanical mixers designed specifically for commercial applications. Regular calibration of equipment plays a crucial role in maintaining precise measurements and ratios. Strict adherence to the manufacturer’s guidelines is essential, encompassing precise mixing ratios, duration, and batch sizes, which directly impact foam expansion, adhesion, and curing. Careful consideration of ambient temperature and humidity conditions during mixing is vital, as extreme temperatures or high humidity can significantly affect foam performance.
Equally important is the assignment of experienced operators who possess in-depth knowledge and expertise in employing precise mixing techniques. By implementing these practices, commercial spray foam projects can achieve the highest standards of precision, resulting in exceptional insulation performance and utmost customer satisfaction.
Step 6: Check Mixing Quality
Inspect the foam mixture as it exits the mixing nozzle. Look for proper color uniformity and observe the foam consistency. Adjust the temperature, pressure, or mixing ratio as needed to achieve desired results.
Step 7: Foam Application
With a fully mixed foam, proceed with the application using the spray foam gun. Maintain proper distance and angle for proper coating.
Step 8: Monitoring Mixing Process
The meticulous monitoring of the spray foam mixing process is crucial to achieving optimal results. By paying close attention to temperature, pressure, and mixing time, you can ensure a perfectly blended spray foam mixture that guarantees success.
Temperature control is vital to prevent materials from overheating before they are adequately mixed. Maintaining the ideal temperature range ensures the components react and blend uniformly, avoiding premature reactions or inconsistencies in the mixture.
Pressure control is equally important in achieving a consistent and uniform mixture. Proper pressure regulation helps prevent the formation of clumps or uneven distribution of the foam components, leading to a more reliable and high-quality result.
Tracking the mixing time is essential as it directly impacts the texture and performance of the foam. Mixing for the recommended duration ensures the components are thoroughly combined, promoting optimal adhesion properties and reducing the risk of issues during application.
By maintaining precise heat control, pressure control, and careful timing throughout the mixing process, you can consistently create perfect spray foam mixtures. This level of control instills confidence in tackling any commercial job, knowing that your spray foam will meet the highest standards and deliver exceptional performance.
Post-Mixing Considerations
Once you’ve finished mixing the foam, it’s important to consider the time constraints for spraying and curing. It’s best to begin spraying no more than 15 minutes after mixing is complete, as this will ensure that the foam remains in its ideal state.
Foam that has been sitting too long can become less effective during the curing process. Additionally, you’ll need to plan for enough time between spraying and curing – typically at least six hours are necessary when working with open cell foam, but closed cell foam may require up to 24 hours of curing time before it reaches its full strength.
When finished with the project, proper storage of any unused foam is a must. Be sure to reseal containers tightly and store them away from extreme temperatures or moisture for future use.
Finally, clean up your work area thoroughly when you’re done; removing all traces of uncured material will help prevent staining or other damage down the line. With these post-mixing considerations in mind, you’re ready to start enjoying your spray foam insulation!
Frequently Asked Questions
What safety equipment do I need when mixing spray foam?
– Protective Clothing: Wear long-sleeved shirts, long pants, and closed-toe shoes to protect your skin from potential contact with the spray foam.
– Gloves: Use chemical-resistant gloves, such as nitrile or neoprene gloves, to shield your hands from direct contact with the foam components.
– Safety Goggles: Wear safety goggles to protect your eyes from any splashes or accidental contact with the spray foam.
– Respirator: Use a respirator mask specifically designed for spray foam applications to prevent inhalation of fumes or airborne particles.
– Ventilation: Ensure proper ventilation in the work area to minimize exposure to fumes and maintain fresh air circulation.
– Fire Extinguisher: Keep a fire extinguisher nearby as a precautionary measure in case of any unexpected fire hazards.
– First Aid Kit: Have a well-stocked first aid kit readily available in case of minor injuries or accidents.
How long does it take for the foam to set?
In general, spray foam starts to set within minutes after application and forms a skin within 30 minutes to an hour. However, it typically takes several hours for the foam to fully cure and reach its maximum strength. The curing process can continue for up to 24 hours or more. It’s important to follow the manufacturer’s instructions regarding curing time and avoid any contact or disturbance until the foam has completely set and cured.
What is the best way to clean up excess foam?
Protect your skin with chemical resistant gloves and use foam removal products to clean up excess spray foam. Be sure to work quickly and safely for the most effective results. Enjoy the process knowing you are taking steps to protect yourself & allowing freedom from messes!